前情提要
最近面試發現 React 的職缺比較多,剛好藉由某次 pre-interview exam 來學習一下並做筆記
Tech Stacks
- react
- next
- mui
- axios
- mysql
- docker
利用 create-react-app / create-next-app init project
1
2
| npx create-react-app@latest
npx create-next-app@latest
|
使用 material ui 作為 UI compnent
- 5.x 版 style 已經不可使用
- 其中使用了 componets Card/Divider/Grid/TextField/Autocomplete/Typography
資料庫使用 mysql
- 因為資料來源為.csv 檔,所以使用 import 工具來建立 table and data
- 加上 PK 與關聯式資料
mysql2 作為 nodejs to mysql 的工具
1
2
3
4
5
6
7
8
9
10
11
12
13
14
15
16
17
18
19
20
21
22
23
24
25
26
27
28
29
| const mysql = require("mysql2/promise");
class dbConnector {
config;
connection;
constructor(config) {
this.config = config || {
host: "172.30.0.2",
port: "3306",
user: "root",
password: "test",
database: "test",
};
}
async connect() {
this.connection = await mysql.createConnection(this.config);
}
async execute(sql) {
const conn = await mysql.createConnection(this.config);
const [rows, fields] = await conn.execute(sql);
await conn.end();
return [rows, fields];
}
}
module.exports = dbConnector;
|
意外發現 Nextjs 也可以寫 API
1
2
3
4
5
6
7
8
9
10
11
12
13
14
15
16
17
18
19
20
21
22
| const connector = require("../../../database/dbConnector");
async function getMovies(Id) {
const conn = new connector();
const sql = `SELECT * FROM test.movies ${Id ? "WHERE Id = " + Id : ""}`;
const [rows] = await conn.execute(sql);
const movies = [];
for (const row in rows) {
const movie = {};
for (const col in rows[row]) {
movie[col] = rows[row][col];
}
movies.push(movie);
}
return movies;
}
export default async function handler(req, res) {
const movies = await getMovies(req.query.Id);
res.status(200).json(movies);
}
|
https://www.npmjs.com/package/@reduxjs/toolkit
撰寫 docker file 製作 app image
1
2
3
4
5
6
7
8
9
10
11
12
13
| FROM node:18-alpine AS build
WORKDIR /app
COPY /app ./
RUN yarn && yarn build
FROM node:18-alpine AS deploy
WORKDIR /app
COPY --from=build /app/package.json ./package.json
COPY --from=build /app/node_modules ./node_modules
COPY --from=build /app/.next ./.next
EXPOSE 3000
CMD [ "yarn", "start" ]
|
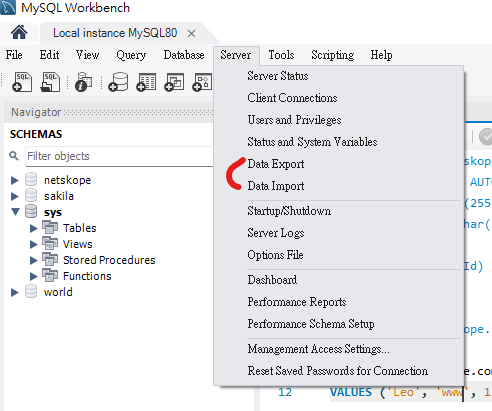
打包 Mysql 與 schema
- 先從 mysql workbench 匯出 schema 跟資料
- 放入相對應的 volumes
1
2
3
4
5
6
7
8
9
10
11
12
13
14
15
16
| version: "3.8"
services:
db:
container_name: db
image: mysql
restart: always
environment:
MYSQL_USER: test
MYSQL_PASSWORD: test
MYSQL_ROOT_PASSWORD: 123456
MYSQL_DATABASE: test
ports:
- 8080:3306
volumes:
- ./sqls:/docker-entrypoint-initdb.d
|
撰寫 ddocker-compose 製作 database and app 環境
- 期間為了讓 app 可以取用 database 的網路,搞了老半天,一開始使用最簡單的方法 network_mode 設定為 host 一直無法成功,最後還是使用 brige 的方式…
1
2
3
4
5
6
7
8
9
10
11
12
13
14
15
16
17
18
19
20
21
22
23
24
25
26
27
28
29
30
31
32
33
34
35
36
37
38
39
| version: "3.8"
services:
db:
container_name: db
image: mysql
restart: always
environment:
MYSQL_USER: test
MYSQL_PASSWORD: test
MYSQL_ROOT_PASSWORD: 123456
MYSQL_DATABASE: test
ports:
- 8080:3306
volumes:
- ./sqls:/docker-entrypoint-initdb.d
networks:
test:
ipv4_address: 172.30.0.2
app:
container_name: app
image: app
build:
context: .
dockerfile: Dockerfile
target: deploy
ports:
- 8081:3000
networks:
test:
ipv4_address: 172.30.0.3
networks:
test:
driver: bridge
ipam:
driver: default
config:
- subnet: 172.30.0.0/16
gateway: 172.30.0.1
|
將 images 推上火坑(docker hub)
1
2
| docker tag SOURCE_IMAGE[:TAG] TARGET_IMAGE[:TAG]
docker push [OPTIONS] NAME[:TAG]
|
修改 docker-compose.yml 的 image 由 docker hub 取得
1
2
3
4
5
6
7
8
9
10
11
| version: "3.8"
services:
db:
container_name: db
image: kidd1118/mysql
。。。略
app:
container_name: app
image: kidd1118/app
。。。略
|
之後 compose up 就完工啦!!!!cheers