0%

前情提要

最近面試發現 React 的職缺比較多,剛好藉由某次 pre-interview exam 來學習一下並做筆記

Tech Stacks

  • react
  • next
  • mui
  • axios
  • mysql
  • docker

利用 create-react-app / create-next-app init project

1
2
npx create-react-app@latest
npx create-next-app@latest

使用 material ui 作為 UI compnent

  • 5.x 版 style 已經不可使用
  • 其中使用了 componets Card/Divider/Grid/TextField/Autocomplete/Typography

資料庫使用 mysql

  • 因為資料來源為.csv 檔,所以使用 import 工具來建立 table and data
  • 加上 PK 與關聯式資料

mysql2 作為 nodejs to mysql 的工具

1
2
3
4
5
6
7
8
9
10
11
12
13
14
15
16
17
18
19
20
21
22
23
24
25
26
27
28
29
const mysql = require("mysql2/promise");

class dbConnector {
config;
connection;
constructor(config) {
this.config = config || {
host: "172.30.0.2", //for docker. host: "127.0.0.1", //for dev.
port: "3306",
user: "root",
password: "test",
database: "test",
};
}

async connect() {
this.connection = await mysql.createConnection(this.config);
}

async execute(sql) {
const conn = await mysql.createConnection(this.config);
const [rows, fields] = await conn.execute(sql);
// console.log("execute!", rows, fields);
await conn.end();
return [rows, fields];
}
}

module.exports = dbConnector;

意外發現 Nextjs 也可以寫 API

1
2
3
4
5
6
7
8
9
10
11
12
13
14
15
16
17
18
19
20
21
22
const connector = require("../../../database/dbConnector");

async function getMovies(Id) {
const conn = new connector();

const sql = `SELECT * FROM test.movies ${Id ? "WHERE Id = " + Id : ""}`;
const [rows] = await conn.execute(sql);
const movies = [];
for (const row in rows) {
const movie = {};
for (const col in rows[row]) {
movie[col] = rows[row][col];
}
movies.push(movie);
}
return movies;
}

export default async function handler(req, res) {
const movies = await getMovies(req.query.Id);
res.status(200).json(movies);
}

使用 reduxjs/toolkit 讓撰寫 redux 更方便

https://www.npmjs.com/package/@reduxjs/toolkit

撰寫 docker file 製作 app image

1
2
3
4
5
6
7
8
9
10
11
12
13
FROM node:18-alpine AS build
WORKDIR /app
COPY /app ./
RUN yarn && yarn build

FROM node:18-alpine AS deploy
WORKDIR /app
COPY --from=build /app/package.json ./package.json
COPY --from=build /app/node_modules ./node_modules
COPY --from=build /app/.next ./.next

EXPOSE 3000
CMD [ "yarn", "start" ]

打包 Mysql 與 schema

  • 先從 mysql workbench 匯出 schema 跟資料
  • 放入相對應的 volumes
1
2
3
4
5
6
7
8
9
10
11
12
13
14
15
16
version: "3.8"

services:
db:
container_name: db
image: mysql
restart: always
environment:
MYSQL_USER: test
MYSQL_PASSWORD: test
MYSQL_ROOT_PASSWORD: 123456
MYSQL_DATABASE: test
ports:
- 8080:3306
volumes:
- ./sqls:/docker-entrypoint-initdb.d

撰寫 ddocker-compose 製作 database and app 環境

  • 期間為了讓 app 可以取用 database 的網路,搞了老半天,一開始使用最簡單的方法 network_mode 設定為 host 一直無法成功,最後還是使用 brige 的方式…
1
2
3
4
5
6
7
8
9
10
11
12
13
14
15
16
17
18
19
20
21
22
23
24
25
26
27
28
29
30
31
32
33
34
35
36
37
38
39
version: "3.8"

services:
db:
container_name: db
image: mysql
restart: always
environment:
MYSQL_USER: test
MYSQL_PASSWORD: test
MYSQL_ROOT_PASSWORD: 123456
MYSQL_DATABASE: test
ports:
- 8080:3306
volumes:
- ./sqls:/docker-entrypoint-initdb.d
networks:
test:
ipv4_address: 172.30.0.2
app:
container_name: app
image: app
build:
context: .
dockerfile: Dockerfile
target: deploy
ports:
- 8081:3000
networks:
test:
ipv4_address: 172.30.0.3
networks:
test:
driver: bridge
ipam:
driver: default
config:
- subnet: 172.30.0.0/16
gateway: 172.30.0.1

將 images 推上火坑(docker hub)

1
2
docker tag SOURCE_IMAGE[:TAG] TARGET_IMAGE[:TAG]
docker push [OPTIONS] NAME[:TAG]

修改 docker-compose.yml 的 image 由 docker hub 取得

1
2
3
4
5
6
7
8
9
10
11
version: "3.8"

services:
db:
container_name: db
image: kidd1118/mysql
。。。略
app:
container_name: app
image: kidd1118/app
。。。略

之後 compose up 就完工啦!!!!cheers

前端面試考題

  1. 列舉 web storge 與特性,適合的使用時機

    • cache
    • local storge
    • session storge
  2. JS event quene, microtask and macrotask

    • micro : promise, async
    • macro : web api, settimeout, setinterval
  3. CROS and prevent

    • Set Http header
    • JSONP
    • Proxy
    • Post Message (iframe)
  4. Browser render pipeline

    • Parse HTML HTML document parsed and the DOM tree as we know it has been built.
    • Recalculate Styles All kind of stylesheets are parsed. Render tree is built. Render tree contains DOM tree nodes that are going to be displayed. Thus, head tag is excluded as well as style and script. Elements with CSS display property set to none are also ignored. On the other hand, pseudo elements, such as :after and :before, are included. Moreover, every text line becomes a single block.
    • Layout (also called reflow) A collection of blocks generated from the render tree. All the block dimensions, that are dependent on each other, are calculated.
    • Paint Rasterization of the blocks and texts. Images decoding and resize if necessary also happen here.
    • Layer Composition Composition of the visual layers that can be processed and painted independently.
  5. Hoasting

  6. Scope for this

  7. Filter duplicate value in array

    • Using Array Filter
    • Using Set and Destructuring
    • Using Object to store
  8. Destructuring

  9. Spread/Rest Operator

  10. vue-router 的 hash 和 history mode

    • hash 模式下的 URL 會帶有 #,跳轉時不會發出 HTTP 請求。限制是不利 SEO,以及會與錨點功能有衝突等。
    • history 模式不會有 #,跳轉時會發出 HTTP 請求。限制是瀏覽器兼容性較差,以及後端需要自行設定,避免 404 問題。
  11. vue-router 的 navigation guards 與其 hook

    • 全域
      • beforeEach
      • beforeResolve
      • afterEach
    • 路由
      • beforeEnter
    • 元件
      • beforeRouteEnter
      • beforeRouteUpdate
      • beforeRouteLeave
  12. Vue Lift Cycle

    • beforeCreate
    • created
    • beforeMount
    • mounted
    • beforeUpdate
    • updated
    • beforeUnmount (3.x)
    • unmounted (3.x)
  13. Vuex ?

  14. Vue two-way binding

Algorithms

LeetCode - 136. Single Number

  • my answer
1
2
3
4
5
6
7
8
9
/**
* @param {number[]} nums
* @return {number}
*/
var singleNumber = function (nums) {
return nums.filter((item, index, arr) => {
return arr.indexOf(item) == index && arr.lastIndexOf(item) == index;
});
};

Time complexity: O(n), Space complexity: O(0)

  • perfact answer (使用互斥 ^)
1
2
3
4
5
6
7
8
9
10
11
/**
* @param {number[]} nums
* @return {number}
*/
var singleNumber = function (nums) {
var result = nums[0];
for (var i = 1; i < nums.length; i++) {
result ^= nums[i];
}
return result;
};

Time complexity: O(n-1), Space complexity: O(0)

string match

  • my answer : 利用兩個指標從前後同時尋找配對字串
1
2
3
4
5
6
7
8
9
10
11
12
13
14
15
16
17
18
19
20
21
22
23
24
25
26
27
28
29
30
31
32
33
34
35
36
37
38
39
40
41
var a = "RTGDAFT",
b = "GDA";
var start_a = 0,
end_a = a.length - 1;
var start_b = 0,
end_b = b.length - 1;
var match = false;
while (start_a < end_a) {
if (a[start_a] == b[start_b]) {
// match = a[start_a];
match = true;
while (start_b < end_b) {
start_a++;
start_b++;
if (a[start_a] != b[start_b]) {
match = false;
break;
}
// match = match + a[start_a];
}
if (match) break;
}
if (a[end_a] == b[end_b]) {
// match = a[end_a];
match = true;
while (start_b < end_b) {
end_a--;
end_b--;
if (a[end_a] != b[end_b]) {
match = false;
break;
}
// match = a[end_a] + match;
}
if (match) break;
}
start_a++;
end_a--;
start_b = 0;
end_b = b.length - 1;
}

Time complexity: O(n / 2 * m), Space complexity: O(0)

LeetCode - 763. Partition Labels

  • my answer : 儲存字元的起始與結束點,看各字元是否有接續
1
2
3
4
5
6
7
8
9
10
11
12
13
14
15
16
17
18
19
20
21
22
23
24
25
26
27
28
/**
* @param {string} s
* @return {number[]}
*/
var partitionLabels = function (s) {
let result = [];
let temp = {};
for (let i = 0; i < s.length; i++) {
const char = s[i];
if (!temp[char]) {
temp[char] = { start: i, end: i };
}
if (i > temp[char].end) {
temp[char].end = i;
}
}
let max = -1;
let start = 0;
for (let i in temp) {
if (temp[i].start > max && max !== -1) {
result.push(max - start + 1);
start = temp[i].start;
}
max = Math.max(max, temp[i].end);
}
result.push(max - start + 1);
return result;
};

Time complexity: O(n + n), Space complexity: O(n)

LeetCode - 22. Generate Parentheses

  • my answer : 使用遞迴去組成
1
2
3
4
5
6
7
8
9
10
11
12
13
14
15
16
17
18
19
/**
* @param {number} n
* @return {string[]}
*/
var generateParenthesis = function (n) {
let result = [];
const dp = (str, openNum, closeNum) => {
if (openNum < closeNum) return;
if (openNum == n) {
for (let i = str.length; i < n * 2; i++) str += ")";
result.push(str);
return str;
}
dp(str + "(", openNum + 1, closeNum);
dp(str + ")", openNum, closeNum + 1);
};
dp("(", 1, 0);
return result;
};

Time complexity: O(2^n), Space complexity: O(n)

counting character

  • my answer : XXXX
1
2
3
4
5
6
7
8
9
10
11
12
13
14
15
16
17
18
19
20
21
22
23
24
25
26
27
28
29
30
31
32
33
34
35
36
37
38
39
40
41
42
43
44
45
46
47
48
49
50
51
52
/*
"H2O" => {
"H": 2,
"O": 1
}

"C2H5OH" => {
"C": 2,
"H": 6,
"O": 1
}

"COOH" => {"C": 1, "O": 2, "H": 1}

// “Mg2C2H” => {“Mg”: 2, “C”: 2, “H”: 1}
*/

// Iterate through each element till end of string
// 1. find char (isNaN) to store to parameter
// 2. couter 1 to this char
// 3. if the next char is number, store to prevValue and combine to string;
// 4. if loop to next char, store previous value to previous element
// 5. loop to end
function stringToObject(input) {
let temp = {};
let prev = "";
let val = "";
for (let i = 0; i < input.length; i++) {
const curr = input[i];
if (isNaN(curr)) {
//is char
temp[curr] = temp[curr] ? Number(temp[curr]) + 1 : 1;
prev = curr;
val = "";
} else {
//is number
if (isNaN(val)) {
val = curr;
} else {
val += curr;
}
temp[prev] = Number(val);
}
}
return temp;
}

console.log(stringToObject("H2O"));
console.log(stringToObject("C2H5OH"));
console.log(stringToObject("COOH"));
console.log(stringToObject("C11O10OH"));
// console.log(stringToObject("Mg2C2H"));

LeetCode - 22. Generate Parentheses

  • my answer : 使用遞迴去組成
1
2
3
4
5
6
7
8
9
10
11
12
13
14
15
16
17
18
19
20
21
const m = {
a: ["e"],
e: ["a", "i"],
i: ["a", "e", "o", "u"],
o: ["i", "u"],
u: ["a"],
};
let result = ["a", "e", "i", "o", "u"],
temp = [];
for (let i = 1; i < 4; i++) {
result.forEach((item) => {
const ms = m[item];
if (ms && ms.length) {
temp = [...temp, ...ms];
}
});
result = temp.length ? [...temp] : result;
temp = [];
}
console.log(result);
console.log(result.length);

Time complexity: O(n*n), Space complexity: O(n)

紀錄職涯的一個階段

年資: 6 年 2 個月
始業職位: Engineer,App
結業職位: Associate Principal Engineer,App

Engineer,App 2016/09 ~ 2020/04

初始部門產品為真人和官與角子老虎機,剛進公司時為了擴展產品線,將兩個產品分離,加入了角子老虎機的部門
角子老虎機初期使用 flash 開發,因 flash 要被淘汰,所以首要任務是把目前所有的 flash 遊戲轉為 html5

現有 flash 角子老虎機遊戲都翻為 html5 後,並持續開發新遊戲,並且將產品架構重整,並加上了許多 fancy 的功能
遊戲公仔,Low / High Qaulity Switch,Runtime 改變場景 layout,Cash Mode,4-in-1,龍虎榜,大獎榜等…

Native Game

也因想要增進使用者體驗,因而想開發 native 的遊戲,不再是使用 webview 去 launch html5 的遊戲,我也擔任了 native game project lead 的角色
經過一陣子的 POC 評估,最終選擇了使用 Unit 作為解決方案,初期也是藉由翻寫 Html5 遊戲的方式去做 native 的遊戲
過程中也算順利,Unit 與 iOS/Android 框架整合後,認為使用 Unit 遊戲做出來的 library 太大(實際上已經 fine tune 到 20-30MB,市面上相同類型遊戲都要 100MB up)
因而中止了 native 遊戲的開發,雖說 project 失敗,但其實過程中也學到了不少東西。

Table Game

角子老虎機遊戲因市場競爭大,Business 方想改做棋牌類遊戲,因此做了第一款棋牌遊戲,初上線時,為我們帶了不錯的營收,讓 Business 方更有信心持續改做棋牌遊戲,之後也陸續做了多款單人,多人棋牌。

Senior Engineer,App 2020/05 ~ 2021/04

Associate Principal Engineer,App 2021/05 ~ 2022/10

在前三年因為表現超出預期,因此也得到了升遷的機會,我覺得主因還是因為喜愛產品,一些前 Senior 離職時,自動去 pick up 了許多工作,因為想要更了解產品,剛好有更多的機會去學習不同東西,期間接收了許多 CI/CD 流程的改進,ELK Dashboard / Watcher 等 monitoring 的建置,並主動去發覺改進架構與問題(有時候是逼不得已的 XD),我對於產品的面相看的更全面,不再只有著重於開發,是需要很多環節去串聯,才可以做出一個好產品。

Frontend Lead

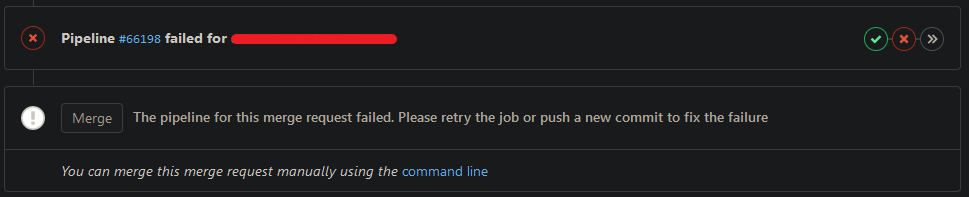
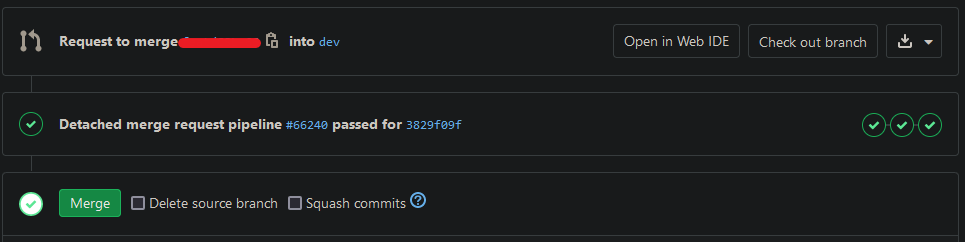
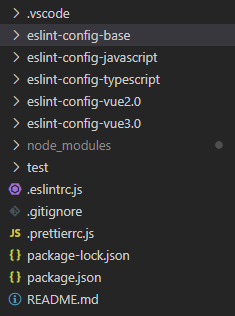
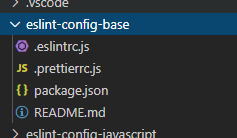
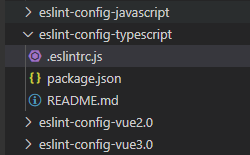
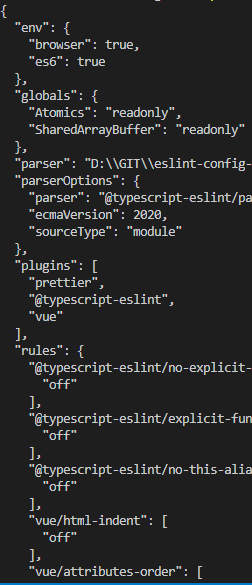
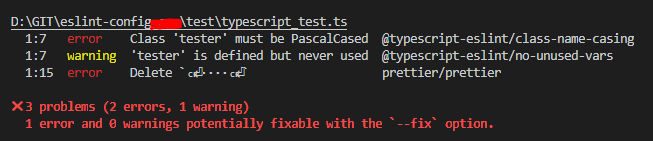
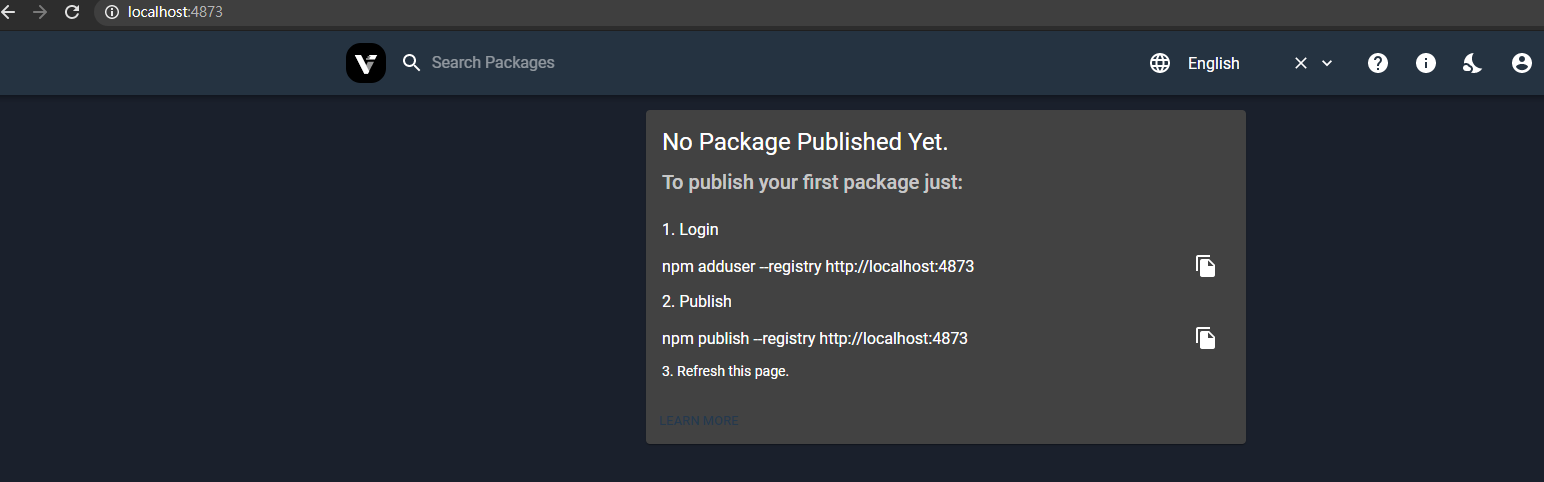
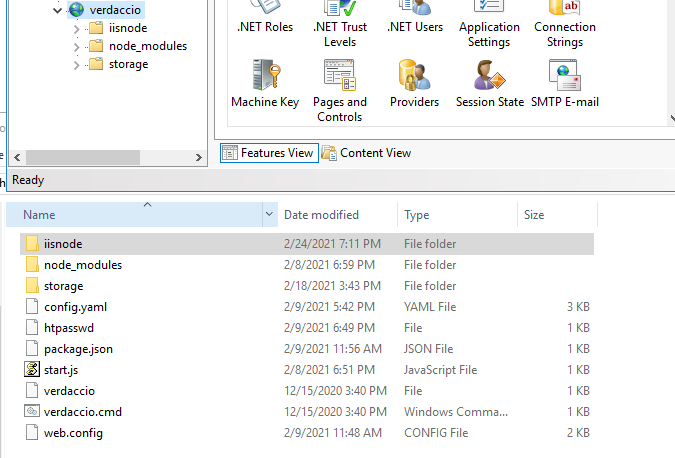
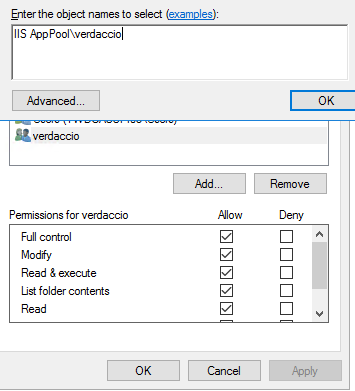
期間做了許多前端架構與流程的改進,規劃並把前端架構改善且自建了 priviate NPM,並把共用 module 與工具發佈至上面。改善 merge 流程,讓他再 commit 前做檢查。
規劃 code convertions,前端 Road Map ,補足前端 High Level Design Chart,upgrade technology version。

Automation Testing

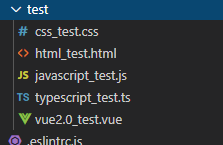
在這期間也擔任自動化測試的 project lead,起初選擇的工具為 Selenium 搭配 Specflow,並使用 C#撰寫,期間我還不負責的訓練 QA 對於測試程式的撰寫,但後來因為職務調動,有了一個專職寫 automaion tesing 的 QA,也因他主要是前端轉 QA,我們下定決心把目前的自動化測試 solution 改為 cypree 搭配 Javascript 撰寫,在此也從中學習了不少。

後記

最後因為產品定位不明,公司政策改變等因素需要把產品回收,因此不得不做了決定,相信每個決定都是深思熟慮過的,但在我六年多的時間裡,對於產品與部門都十分熱愛,雖說沒有走到最後,但畢竟努力過了,且認真對待過就無悔了。在此職涯期間是我學習到最多東西的時期,不管對工作,對技術,對同事等,都大開了眼界,原來工作可以與生活並重,以往都被工作綁住,把所有時間都花在了工作上。

本文章可以幫你

  1. GitLab Merge when pipleline succeeds設定
  2. 使用GitLab CI/CD
  3. 使用ESLint/StyleLint檢查程式碼

設定GitLab的Merge when pipeline succeeds/啟動runners

  1. 官方文件可以參考 site1
    site2
  2. GitLab設定的位置[Repo] => Settings => General => Merge requests
  3. 記得啟動runners[Repo] => Settings => CI/CD => Runners

在專案裡面新增GitLab CI comfig

  1. 新增.gitlab-ci.yml並設定其內容
  2. 設定workflow讓pipeline只在Merge Request Contenx建立的時候才執行
    1
    2
    3
    4
    5
    6
    7
    8
    9
    10
    11
    12
    13
    14
    15
    16
    17
    18
    19
    20
    21
    22
    23
    24
    25
    26
    27
    28
    29
    30
    31
    32
    33
    34
    35
    36
    37
    38
    39
    40
    41
    42
    43
    44
    45
    46
    47
    48
    49
    50
    51
    52
    53
    54
    workflow:
    rules:
    - if: $CI_MERGE_REQUEST_ID # Execute jobs in merge request context
    - if: $CI_COMMIT_BRANCH == 'dev' # Execute jobs when a new commit is pushed to dev branch

    stages:
    - prepare
    - check
    - build
    - deploy

    cache:
    paths:
    - node_modules/

    install:
    stage: prepare
    # only: => going to be deprecated,根據gitloab 11.x doc,即將被拋棄
    # - dev
    script:
    - npm install

    eslint:
    stage: check
    # only: => going to be deprecated,根據gitloab 11.x doc,即將被拋棄
    # - dev
    dependencies:
    - prepare
    script:
    - eslint src/*.ts

    stylelint:
    stage: check
    # only: => going to be deprecated,根據gitloab 11.x doc,即將被拋棄
    # - dev
    dependencies:
    - prepare
    script:
    - stylelint src/css/**/*.scss

    build:
    stage: build
    # only: => going to be deprecated,根據gitloab 11.x doc,即將被拋棄
    # - dev
    dependencies:
    - prepare
    script:
    - npm run build

    deploy:
    stage: deploy
    script: ./deploy
    rules:
    - if: $CI_COMMIT_BRANCH == 'dev' # Execute jobs when a new commit is pushed to dev branch

設定eslint/stylelint

  1. 安裝eslint與設定
    • install packages
      1
      npm install eslint eslint-config-prettier eslint-plugin-prettier @typescript-eslint/eslint-plugin @typescript-eslint/parser
    • .eslintrc.js
      1
      2
      3
      4
      5
      6
      7
      8
      9
      10
      11
      12
      13
      14
      15
      16
      17
      18
      19
      20
      21
      22
      23
      24
      25
      26
      27
      28
      29
      30
      module.exports = {
      env: {
      browser: true,
      es6: true
      },
      extends: [
      // Uses the recommended rules from the @typescript-eslint/eslint-plugin
      "plugin:@typescript-eslint/recommended",
      // Uses eslint-config-prettier to disable ESLint rules from @typescript-eslint/eslint-plugin that would conflict with prettier
      "prettier/@typescript-eslint",
      // Enables eslint-plugin-prettier and eslint-config-prettier. This will display prettier errors as ESLint errors.
      // Make sure this is always the last configuration in the extends array.
      "plugin:prettier/recommended"
      ],
      globals: {
      Atomics: "readonly",
      SharedArrayBuffer: "readonly"
      },
      parser: "@typescript-eslint/parser",
      parserOptions: {
      ecmaVersion: 2018,
      sourceType: "module"
      },
      plugins: ["@typescript-eslint"],
      rules: {
      "prettier/prettier": ["error"],
      "@typescript-eslint/no-explicit-any": "off",
      "@typescript-eslint/interface-name-prefix": "off"
      }
      };
    • 使用
      1
      eslint src/js/**/*.ts --fix
  2. 安裝stylelint與設定
    • install packages
      1
      npm install stylelint stylelint-config-prettier stylelint-config-sass-guidelines stylelint-config-standard stylelint-order stylelint-scss
    • .stylelintrc.js
      1
      2
      3
      4
      5
      6
      7
      8
      9
      10
      11
      12
      13
      14
      15
      16
      17
      18
      19
      20
      21
      module.exports = {
      extends: ["stylelint-config-standard", "stylelint-config-sass-guidelines"],
      rules: {
      indentation: 4,
      "selector-max-id": null,
      "max-nesting-depth": null,
      "function-url-quotes": null,
      "selector-class-pattern": null,
      "selector-max-compound-selectors": null,
      "selector-max-compound-selectors": null,
      "selector-max-compound-selectors": null,
      "selector-no-qualifying-type": null,
      "no-descending-specificity": null,
      "declaration-block-no-duplicate-properties": null,
      "function-linear-gradient-no-nonstandard-direction": null,
      "selector-id-pattern": null,
      "font-family-no-missing-generic-family-keyword": null,
      "function-no-unknown": null,
      "max-line-length": null
      }
      };
    • 使用
      1
      stylelint src/css/**/*.scss --fix

前置作業設定好了,試試看吧!

  1. 執行後,可以從[Repo] => CI/CD => Piplelines/Jobs去看結果

  2. 設定eslint error level去測試錯誤結果

    commit後pipeline因為eslint error跑失敗

    開了merge request會無法merge,需要先修正pipeline的錯誤

[Enhancement]修改為當workflow成立時才可以Merge

  1. 將.gitlab ci config加上workflow rules
    1
    2
    3
    4
    workflow:
    rules:
    - if: $CI_MERGE_REQUEST_ID # Execute jobs in merge request context
    - if: $CI_COMMIT_BRANCH == 'dev' # Execute jobs when a new commit is pushed to dev branch
  2. 如此一來當在gitlab上開Merge request時,會自動跑CI/CD,成功後才可以去Merge

本文章可以幫你

  1. 使用NVM做nodeJS版本控管
  2. 將Gulp3升級至Gulp4
  3. 排除遇到的雷

安裝NVM與使用

  1. 先安裝nvm windows
  2. 簡單的nvm指令
    1
    2
    3
    nvm install [node version]
    nvm list
    nvm use [node version]

安裝Gulp到NVM

NVM會將node_modules裝到該NVM/[node version]目錄下,不是原本預設的 C:\Users[user name]\AppData\Roaming\npm,因此需要重新安裝npm install gulp -g

安裝Gulp4後會需要修改的寫法

  1. 將 “run-sequence”改為gulp.series與gulp.parallel
    • gulp3
      1
      2
      3
      4
      5
      6
      7
      8
      9
      10
      11
      12
      13
      gulp.task("my-task", function() {
      runSequence(
      "my-task1",
      "my-task2",
      [
      "my-task3",
      "my-task4"
      ],
      function() {
      console.log("run");
      }
      );
      });
    • gulp4
      1
      2
      3
      4
      5
      6
      7
      8
      9
      10
      11
      12
      13
      14
      gulp.task("my-task",
      gulp.series(
      "my-task1",
      "my-task2",
      gulp.parallel(
      "my-task3",
      "my-task4"
      ),
      function(cp) {
      console.log("run");
      cp();
      }
      )
      );
  2. 將gulp.run改為tast()
    • gulp3
      1
      gulp.run("my-task", function() {});
    • gulp4
      1
      gulp.task("my-task", function() {});
  3. 回傳值需要加上return
    • gulp3
      1
      2
      3
      gulp.task("my-task", function() {
      gulp.src(["./src"]).pipe(gulp.dest("build"));
      });
    • gulp4
      1
      2
      3
      gulp.task("my-task", function() {
      return gulp.src(["./src"]).pipe(gulp.dest("build"));
      });
  4. 呼叫task的時候需要預先定義好,因此需要把呼叫端方到後方
  5. sass呼叫需要修改
    • gulp3
      1
      2
      const sass = require("gulp-sass");
      sass.compiler = require("sass");
    • gulp4
      1
      const sass = require("gulp-sass")(require("sass"));

本文章可以幫你

  1. 使用prettier rule定義eslint config
  2. 改寫default prettier rule
  3. 設定auto formatter by prettier in VS code setting
  4. 把config package publish到private NPM
  5. 下載使用config package

使用prettier rule定義eslint config

基本規劃

  1. 建立一個使用prettier的linter base
    • .eslintrc.js
      1
      2
      3
      4
      5
      6
      7
      8
      9
      10
      11
      12
      13
      14
      15
      16
      17
      18
      19
      20
      21
      22
      module.exports = {
      env: {
      browser: true,
      es6: true
      },
      extends: [
      "plugin:prettier/recommended"
      ],
      globals: {
      Atomics: "readonly",
      SharedArrayBuffer: "readonly"
      },
      parser: "",
      parserOptions: {
      ecmaVersion: 2018,
      sourceType: "module"
      },
      plugins: ["eslint-plugin-prettier"],
      rules: {
      "prettier/prettier": ["error"]
      }
      };

      改寫default prettier rule

    • .prettierrc.js
      1
      2
      3
      4
      5
      6
      module.exports = {
      semi: true,
      singleQuote: false,
      printWidth: 120,
      tabWidth: 4
      };
  2. 根據不同程式語言或框架去定義不同的linter,以typescript為例
    • .eslintrc.js
      1
      2
      3
      4
      5
      6
      7
      8
      9
      10
      11
      12
      13
      14
      15
      16
      module.exports = {
      env: {},
      extends: [
      // inculing eslint base for javascript
      "../eslint-config-base/.eslintrc.js",
      "plugin:@typescript-eslint/recommended",
      "prettier/@typescript-eslint"
      ],
      globals: {},
      parser: "@typescript-eslint/parser",
      parserOptions: {},
      plugins: [],
      rules: {
      "@typescript-eslint/no-explicit-any": "off"
      }
      };
      設定好可以使用以下command去撈出目前所有載入的規則
      1
      npx eslint --print-config path::String
  3. 測試rules
    • 在package.json建立測試script
      1
      2
      3
      4
      5
      6
      7
      8
      9
      10
      11
      12
      13
      14
      15
      16
      17
      18
      19
      20
      21
      22
      23
      24
      {
      "name": "eslint-config-leoru",
      "main": ".eslintrc.js",
      "version": "0.0.1",
      "license": "MIT",
      "scripts": {
      "eslint-test-base": "./node_modules/.bin/eslint test/*.* --config eslint-config-base/.eslintrc.js",
      "eslint-test-js": "./node_modules/.bin/eslint test/*.js --config eslint-config-javascript/.eslintrc.js",
      "eslint-test-ts": "./node_modules/.bin/eslint ./test/typescript_test.ts --config eslint-config-typescript/.eslintrc.js",
      "eslint-test-vue2.0": "./node_modules/.bin/eslint test/*.vue --config eslint-config-vue2.0/.eslintrc.js",
      "eslint-test-vue3.0": "./node_modules/.bin/eslint test/*.vue --config eslint-config-vue3.0/.eslintrc.js"
      },
      "dependencies": {},
      "devDependencies": {
      "@typescript-eslint/eslint-plugin": "^2.3.1",
      "@typescript-eslint/parser": "^2.3.1",
      "typescript": "2.5.2",
      "eslint": "^6.4.0",
      "eslint-config-prettier": "^6.3.0",
      "eslint-plugin-prettier": "^3.1.1",
      "eslint-plugin-vue": "^8.1.1",
      "prettier": "^1.18.2"
      }
      }
      執行測試
      1
      npm run eslint-test-ts

設定auto formatter by prettier in VS code setting

在.vscode/setting.json設定

1
2
3
4
5
6
7
8
9
10
11
12
13
14
15
16
17
18
19
20
21
22
23
24
25
26
27
28
29
30
31
32
33
34
35
36
37
38
39
40
41
42
43
44
45
46
{
"eslint.alwaysShowStatus": true,
"eslint.options": {
"extensions": [".ts", ".js", ".vue"]
},
"eslint.validate": ["typescript", "javascript", "vue"],

"editor.defaultFormatter": "esbenp.prettier-vscode",
"editor.formatOnSave": true,
"editor.codeActionsOnSave": {
"source.fixAll.eslint": true
},
"[javascript]": {
"editor.defaultFormatter": "esbenp.prettier-vscode",
"editor.formatOnSave": true,
"editor.codeActionsOnSave": {
"source.fixAll.eslint": true
}
},
"[typescript]": {
"editor.defaultFormatter": "esbenp.prettier-vscode",
"editor.formatOnSave": true,
"editor.codeActionsOnSave": {
"source.fixAll.eslint": true
}
},
"[vue]": {
"editor.defaultFormatter": "esbenp.prettier-vscode",
"editor.formatOnSave": true,
"editor.codeActionsOnSave": {
"source.fixAll.eslint": true
}
},
"[html]": {
"editor.defaultFormatter": "esbenp.prettier-vscode",
"editor.formatOnSave": true
},
"[json]": {
"editor.defaultFormatter": "esbenp.prettier-vscode",
"editor.formatOnSave": true
},
"[css]": {
"editor.defaultFormatter": "esbenp.prettier-vscode",
"editor.formatOnSave": true
}
}

把config package publish到private NPM

先設定project name跟預設執行的main

1
2
3
4
5
6
7
8
9
10
11
12
13
{
"name": "@eslint-config-leo/eslint-config-base",
"main": ".eslintrc.js",
"version": "0.0.1",
"license": "MIT",
"dependencies": {},
"devDependencies": {
"eslint": "^6.4.0",
"eslint-config-prettier": "^6.3.0",
"eslint-plugin-prettier": "^3.1.1",
"prettier": "^1.18.2"
}
}

然後發布吧!!!

1
npm publish

下載使用config package

先安裝npm packages for eslint

1
npm install @eslint-config-leo/eslint-config-base --save-dev

接著設定project .eslintrc.js and .prettierrc.js

  • .eslintrc.js
    1
    2
    3
    module.exports = {
    extends: ["@eslint-config-leo/base"] //eslint-config-可以省略
    };
  • .prettierrc.js
    1
    2
    3
    module.exports = {
    ...require("./node_modules/@eslint-config-leo/eslint-config-base/.prettierrc.js")
    };

接著大方地使用吧 ~~~~~

本文章可以幫你

  1. 安裝與設定verdaccio
  2. 將verdaccio掛載到IIS
  3. 建立元件並發布到verdaccio
  4. 安裝元件並使用
  5. 把元件掛載到CI/CD Flow上
  6. 一些troubleshooting

安裝與設定verdaccio

安裝十分簡單
1.安裝verdaccio至globle

1
$ npm install verdaccio -g

2.啟動verdaccio

1
$ verdaccio

於瀏覽器網址列打下 http://localhost:4873/ 即可見到以下畫面

P.S 如果上傳的package size過大,會出現以下錯誤訊息

可於
C:\Users{username}\AppData\Roaming\verdaccio\config.yaml
加上max_body_size: 100mb
C:\Users{username}.npmrc
加上max_body_size=100mb

將verdaccio掛載到IIS

local測試完成後,試著將verdaccio掛成一個服務吧!!
因為筆者公司的server為windows base,因此試著將他掛到IIS上
官網有十分詳細教學

1.安裝iisnode
2.於安裝目錄執行

1
$ npm install

3.將網站掛到IIS上

4.因需要讓verdaccio去讀寫網站資料夾,因次需要增加角色給予full control

5.增加Hanlder Mappings for iisnode並設定Feature Permission


完成後使用瀏覽器執行出現以下訊息,damnnnn!!!

發現還需要指定nodejs執行的路徑 => issue

完成設置!

建立元件並發布到verdaccio

建立元件有幾個地方要注意
1.設置.npmignore,如果使用typescript的話,記得tsconfig.json一定要設定不然會造成路徑衝突

2.因筆者建立的Private NPM沒有對外網路,因此選擇將package name加上scope並在.npmrc/.yarnrc設定不同registry

.npmrc

1
@leo:registry=http://xx.xx.xx.xx:8089/

.yarnrc
1
"@leo:registry" "http://xx.xx.xx.xx:8089/"

可以讓npm install或yarn add要安裝scope內的packages時自動使用private NPM

安裝元件並使用

1.安裝

1
$ npm install @leo/common -s

2.想要讓程式對應到基礎元件,因此調整了tsconfig.json的baseUrl

把元件掛載到CI/CD Flow上

1.建立Build and Publish Job,使用windows batch

1
$ npm publish --registry http://xx.xx.xx.xx:8089/ --always-auth false

2.建立版本自動遞增規則

1
2
3
4
5
6
$ IF NOT "%version%" == "none" (
$ git reset --hard
$ npm version %version%
$ git push "origin" --tags
$ git push "origin" HEAD:master
$ )

3.建立GitLab webhook,版控Merged自動trigger job

如此一來CI/CD Flow也完成,流程如下:
=> branch merge to master
=> auto trigger jenkins job
=> build package and publish to private NPM
=> version update and push tag to origin